How to Build a DIY Golf SimulatorPart 7 of 12
How to Finish Your Golf Simulator Floor and Room
How-To

How to Finish Your Golf Simulator Floor and Room

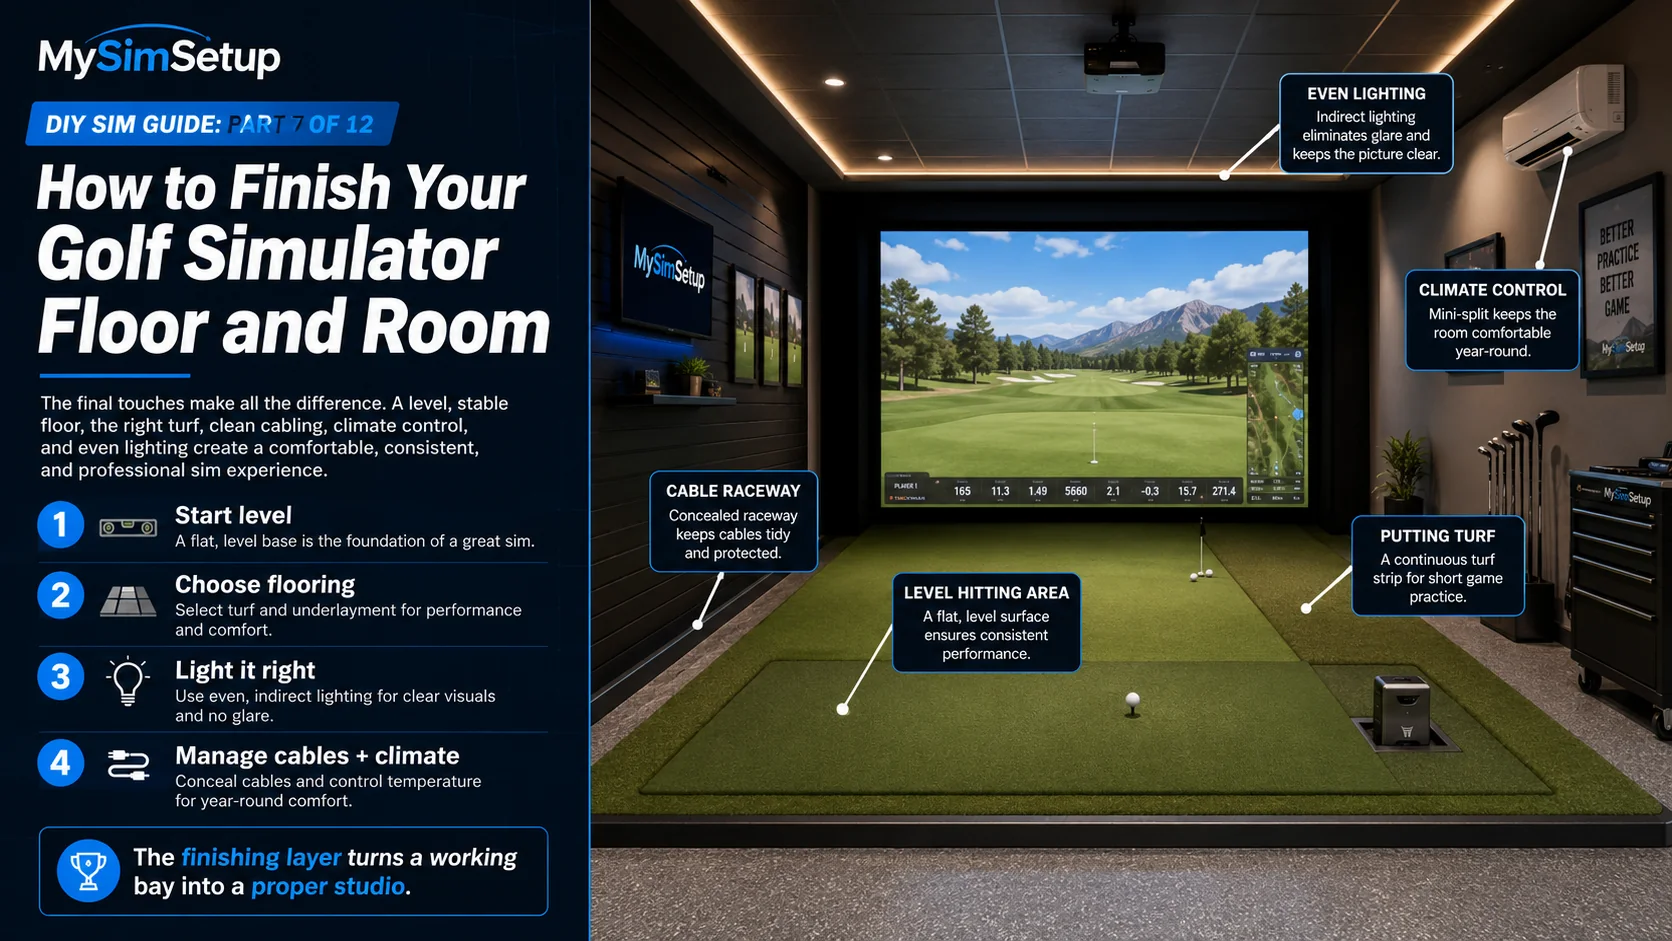
The finishing layer. A level floor, real putting turf, good lighting, and tidy cable runs turn a working bay into a room you actually want to spend time in.

My Sim Setup·Jul 1, 2026·3 min read· 0 views

By now you have the big components chosen; this chapter is about the room they live in. The finishing layer, leveling, flooring, putting turf, lighting, cable management, and climate, is what separates a pile of gear from a proper studio. It also quietly affects performance: an unlevel floor skews your stance and your launch-monitor data, and bad lighting can confuse a camera-based unit. Here is how to finish the space so it plays well and feels great.

Start level

Before anything else, check whether your floor is level across the hitting area. An unlevel surface tilts your stance, changes the relationship between the ball and the launch monitor, and can throw off readings, all for a reason that is invisible until you look for it. Lay a level across the hitting zone and shim or level as needed so you are standing and swinging on a true surface.
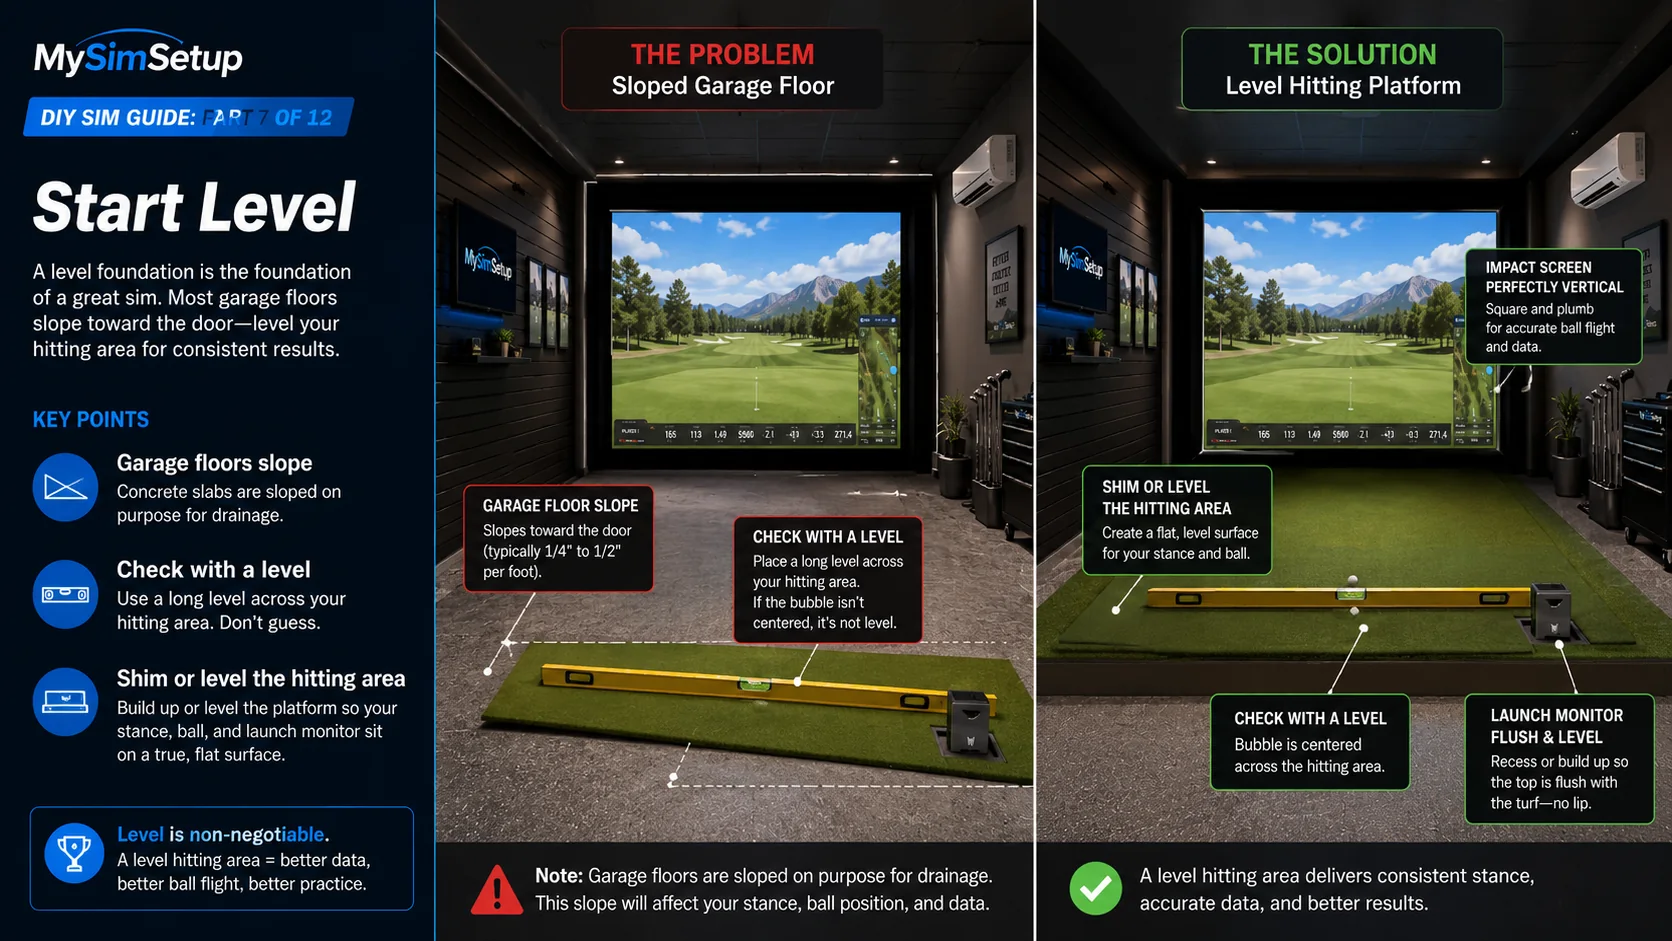
⚠️Garage floors are sloped on purpose: they pitch toward the door for drainage. That gentle slope is enough to tilt your stance and skew launch-monitor data. Check with a level and shim the hitting area flat before you build on it.
A sloped garage floor that tilts the stance and skews data, next to a level hitting platform with the impact screen square and the launch monitor flush and level.
A sloped garage floor (typically 1/4 to 1/2 inch per foot toward the door) tilts your stance and skews the data. A shimmed, level hitting area with a flush monitor delivers consistent, accurate results. Check with a long level first.

Flooring options

Wall-to-wall turf

The most immersive and cohesive look: turf across the whole bay ties the room together, deadens sound, and feels like a course. It costs the most and takes the most work to install cleanly, but the payoff in feel and quiet is real.

Foam tiles or underlayment

Interlocking foam tiles or a rubber underlayment are cheap, warm underfoot, forgiving to stand on, and excellent at deadening the thump of impact into the floor below, a great choice over concrete, especially in a basement above living space.

Concrete or a rug

The budget path is to leave the existing floor and add an area rug or a mat surround for footing and warmth. It works, though you give up some sound-deadening and the finished look of turf or tile.
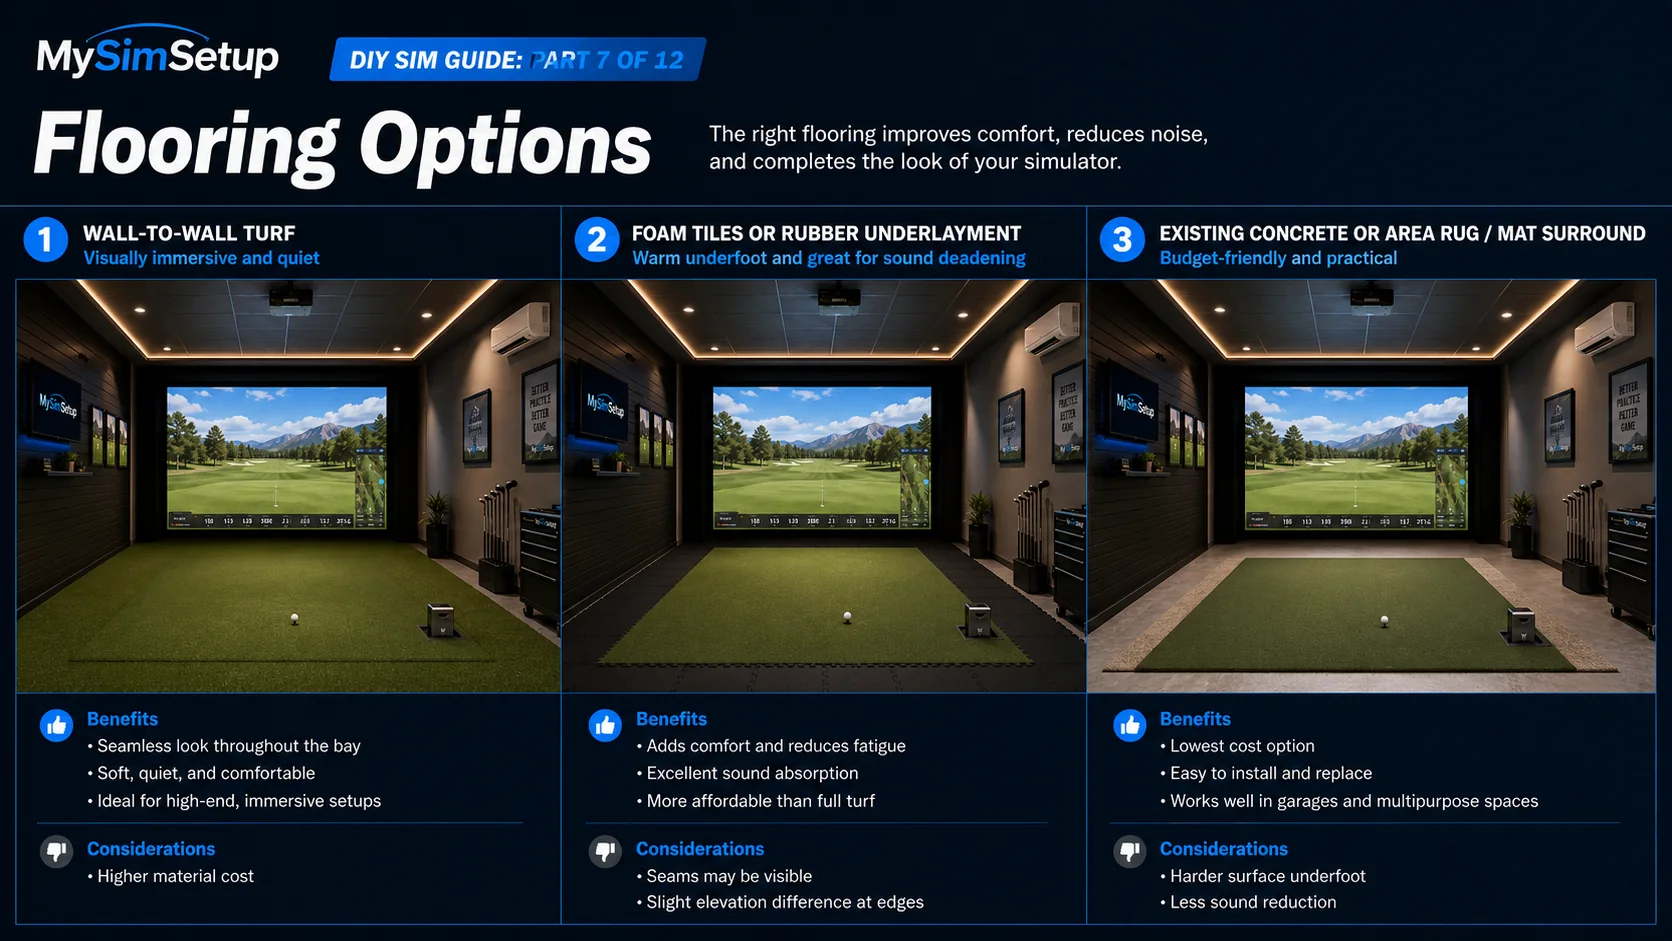
Three flooring approaches side by side: wall-to-wall turf, interlocking foam tiles or rubber underlayment, and existing concrete with an area rug or mat surround, each with benefits and considerations.
Wall-to-wall turf: seamless, soft, and quiet, but the highest cost. Foam tiles or underlayment: comfortable and great at sound absorption, though seams can show. Concrete or a rug: lowest cost and easy, but harder underfoot with less sound reduction.

Putting turf

Adding a putting surface in front of the hitting area lets you actually hole out and practice the short game your scores depend on. Pay attention to the roll speed of the turf you choose and give yourself a few feet of true, level surface. Even a modest putting strip makes the sim feel far more complete.
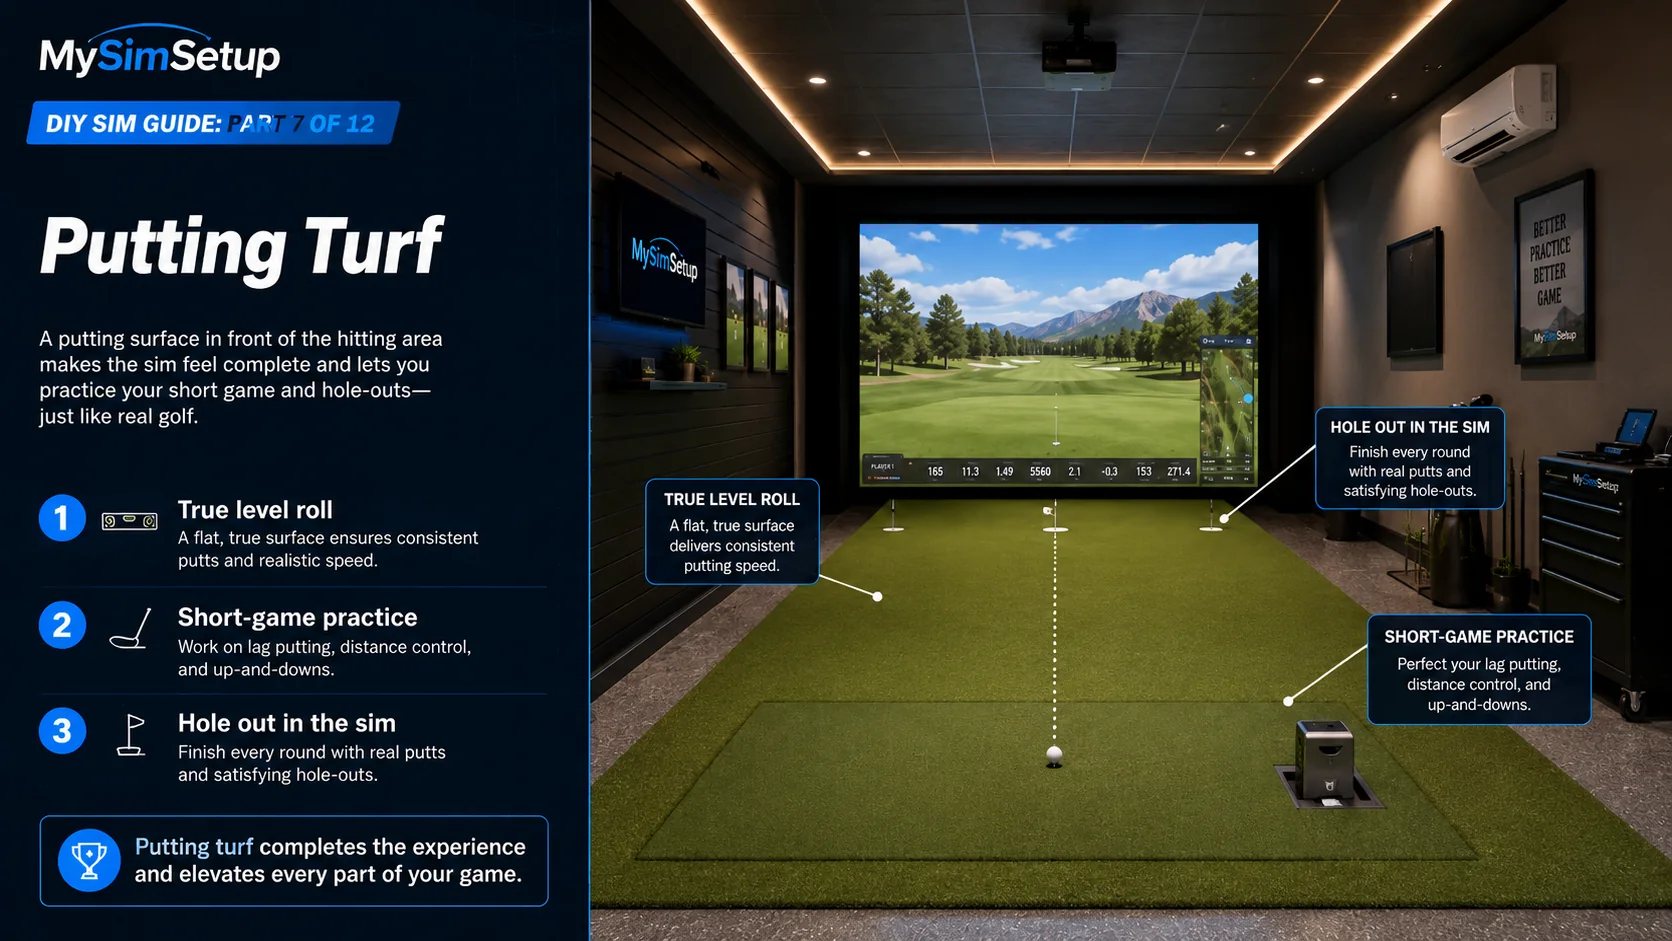
A putting strip running in front of the hitting area, calling out true level roll for consistent speed, short-game practice, and holing out in the sim.
A flat, true putting surface in front of the hitting area gives consistent roll speed, lets you work on lag putting and up-and-downs, and lets you hole out every round, so the sim feels like real golf.

Lighting

Aim for even, indirect light with no glare hitting the screen and no harsh spots or deep shadows in the hitting area. Dimmable fixtures let you match the room to the moment: brighter for setup and streaming, darker for the most vivid projected image. Position lights so they illuminate you and the ball without washing out the screen.
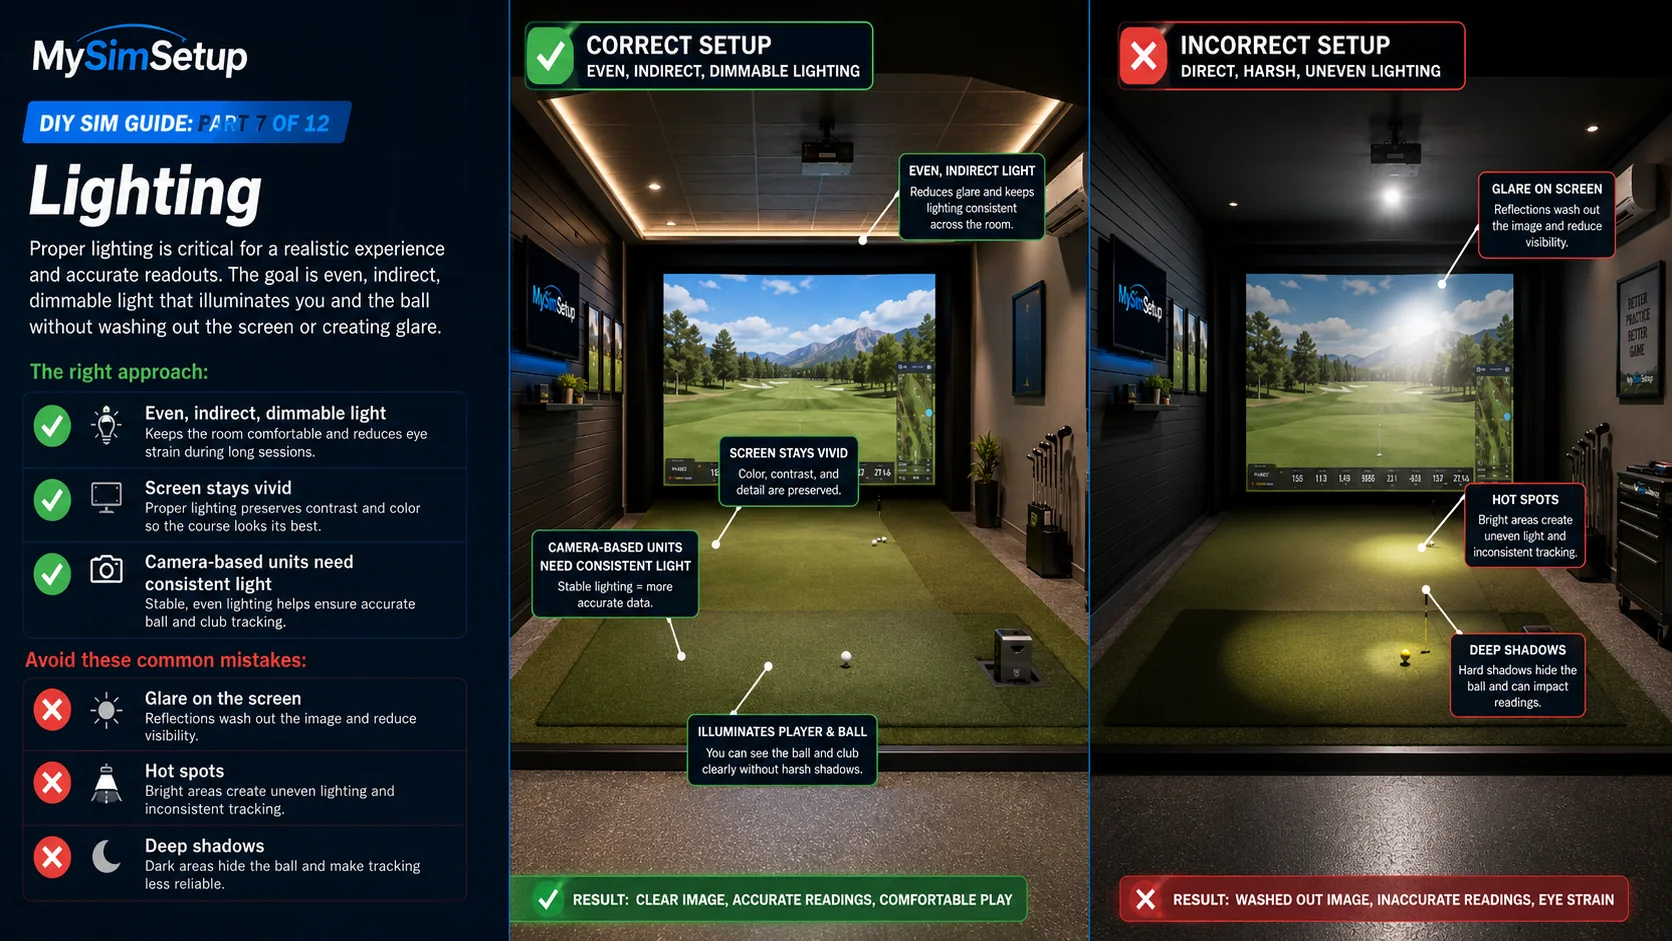
A correct setup with even, indirect, dimmable light keeping the screen vivid, next to an incorrect setup where direct, harsh, uneven light causes glare on the screen, hot spots, and deep shadows.
Even, indirect, dimmable light keeps the screen vivid, feeds camera-based units consistent data, and is easy on the eyes. Direct, harsh light causes screen glare, hot spots, and deep shadows that wash out the image and hurt tracking.
💡Camera-based launch monitors are picky about light. Too dim and they lose the ball; too harsh or uneven and they misread it. Even, consistent lighting helps the unit read every shot, and it makes the room look and feel better too. Get the light right and both your data and your vibe improve.

Cable management and power

A sim has real power needs: the projector, PC, launch monitor, and lighting all draw at once. Do not daisy-chain cheap power strips; use quality surge protection and, for a garage bay, consider a dedicated circuit. Run cables in raceway or conduit for a clean, safe look, keep data cables away from power lines to avoid interference, and label everything now, because future-you will be grateful when something needs unplugging.
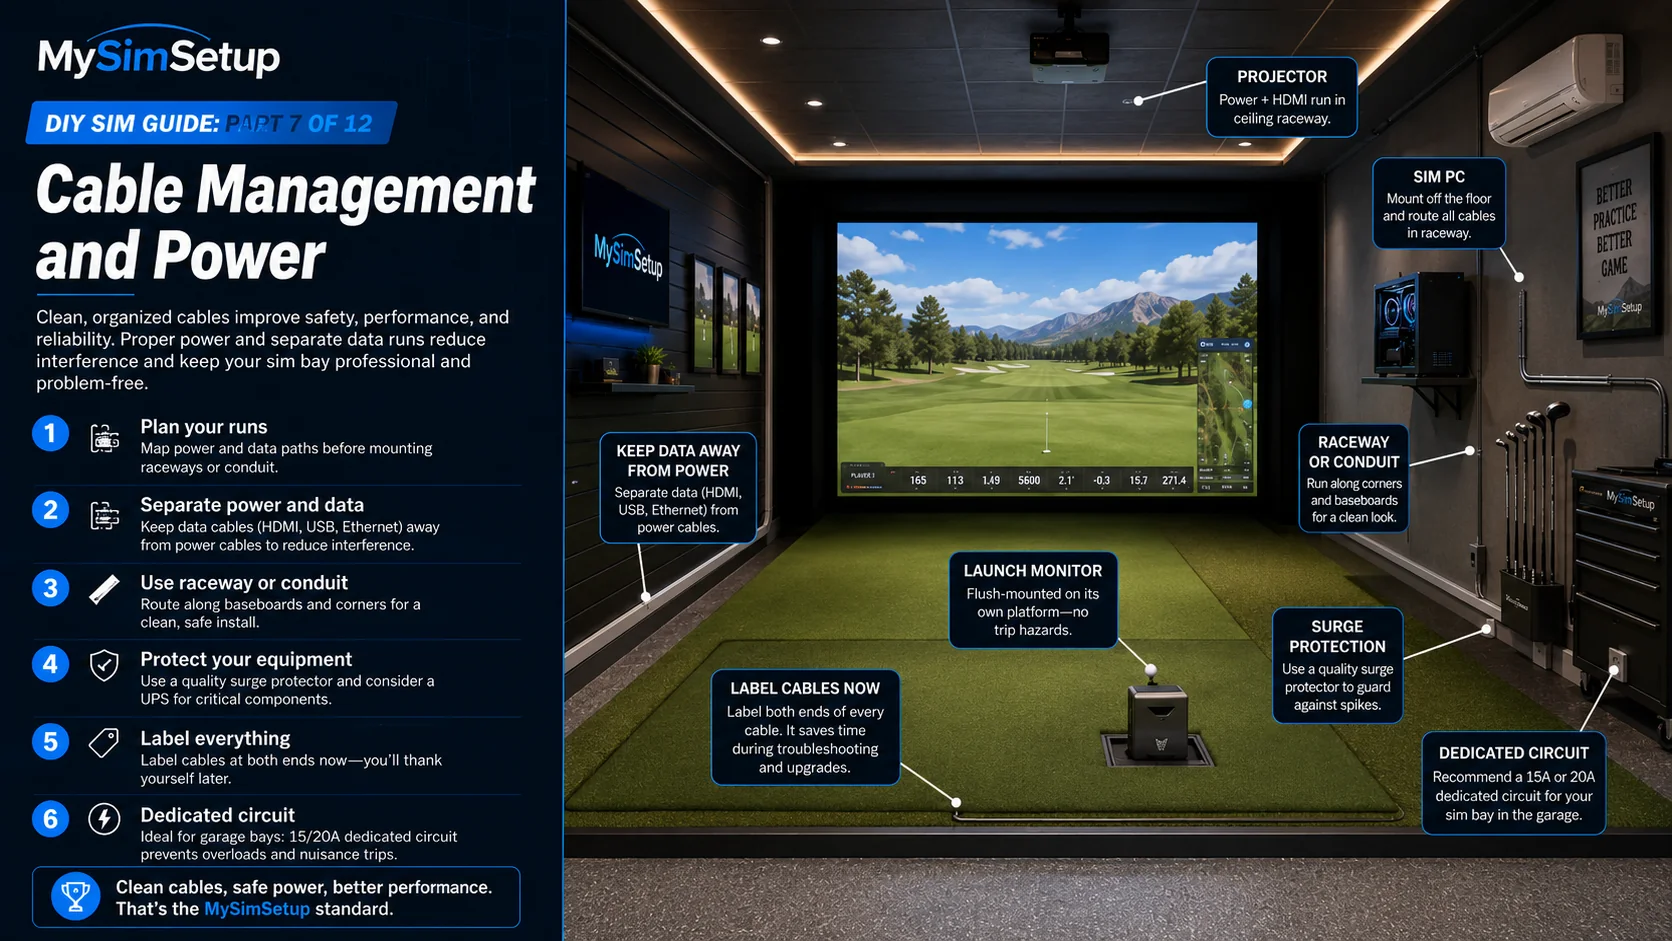
A finished bay with cables run in ceiling raceway and along baseboards, the PC mounted off the floor, surge protection, and a dedicated circuit, with callouts for planning runs, separating power and data, and labeling everything.
Plan your runs, keep data cables away from power to avoid interference, route along baseboards in raceway or conduit, use quality surge protection, label both ends of every cable, and for a garage bay run a dedicated 15A or 20A circuit.

Climate

A comfortable room is a used room. Insulation, a mini-split for heating and cooling, or a dehumidifier keep the space usable year-round and protect your electronics from temperature and humidity extremes, especially in garages and basements. Comfort is not a luxury here; it is what determines whether you actually play.
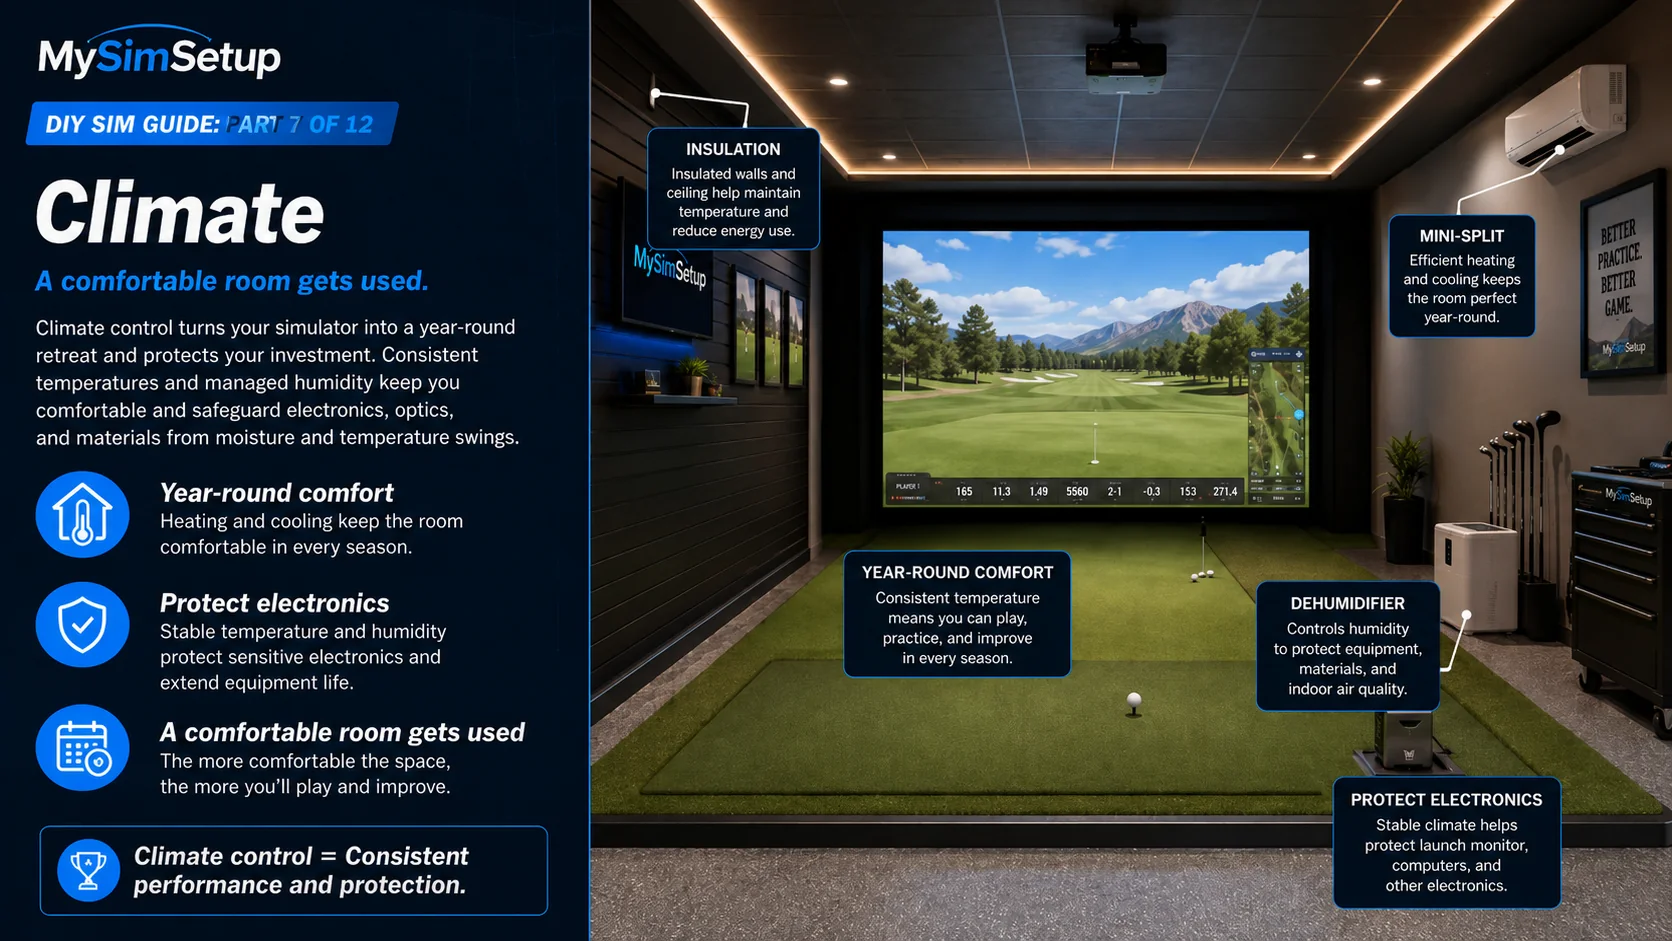
A finished bay with a mini-split, insulation, and a dehumidifier keeping the room comfortable year-round and protecting the electronics.
Insulation, a mini-split for heating and cooling, and a dehumidifier keep the room comfortable in every season and protect your launch monitor, computer, and optics from temperature and humidity swings. A comfortable room is a room you actually use.
📐 Lay out your finished room in the builder
💡 Compare lighting options
💡The room is finished. Now bring it to life with the computer and software that turn shots into courses. On to Part 8.
Ready to plan your sim? Walk through every component with live pricing + a 3D room preview.
📐 Start Your Build →
← PreviousHow to Choose a Golf Simulator Hitting MatNext →How to Pick the PC and Software for Your Golf Simulator